- Published on
Using Custom Domain in Vercel
- Authors

- Name
- Veri Ferdiansyah
- @vferdiansyah
For a website with static content like this blog, people usually use either Netlify or Vercel to host it because you don't need to maintain your own server or even manage your own SSL certificate. In both platforms, you can either use a custom subdomain that they provide (e.g. https://vferdiansyah.vercel.app), or if you already have your own domain, you can opt to use it instead.
Vercel Setup
On your Vercel dashboard, select the project that you want to associate with your custom domain and go to Settings then select Domains menu item.
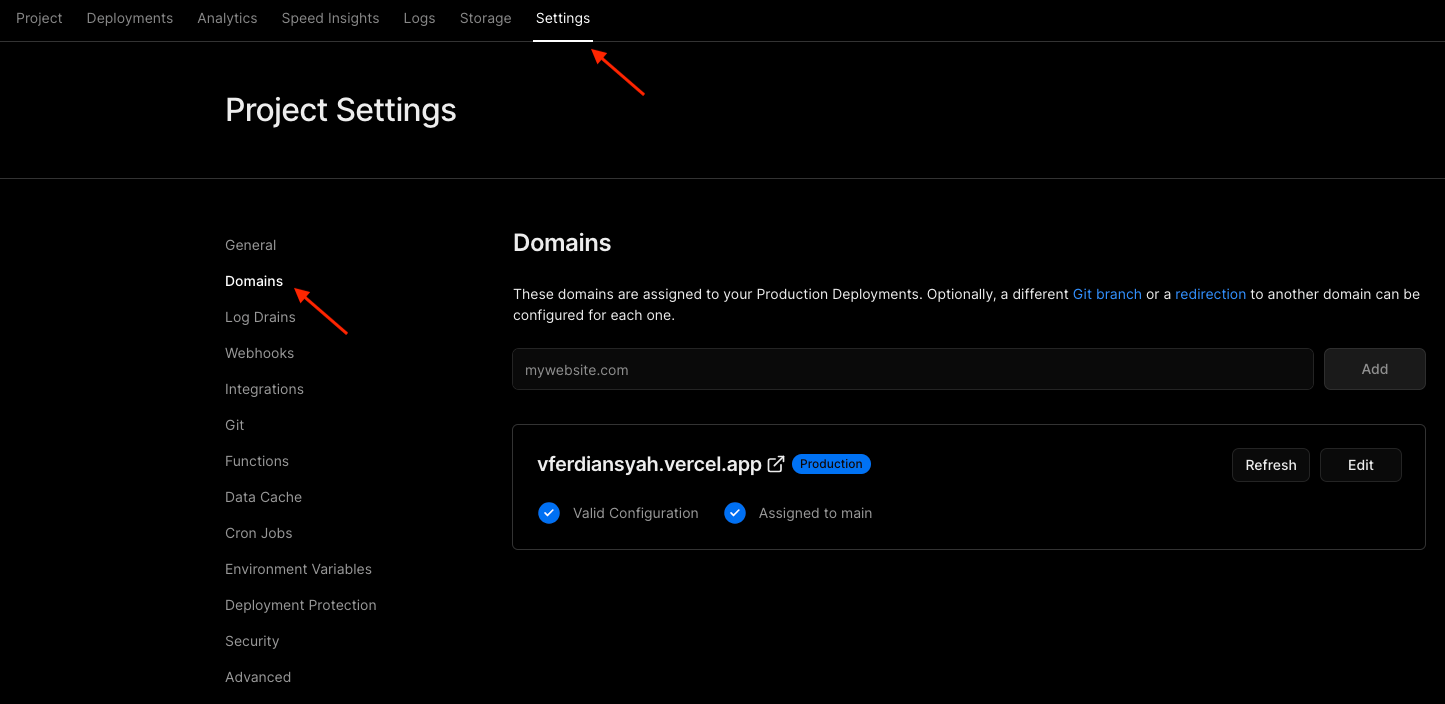
In the Domains page, enter the domain name that you want to add, and click Add button on the right.

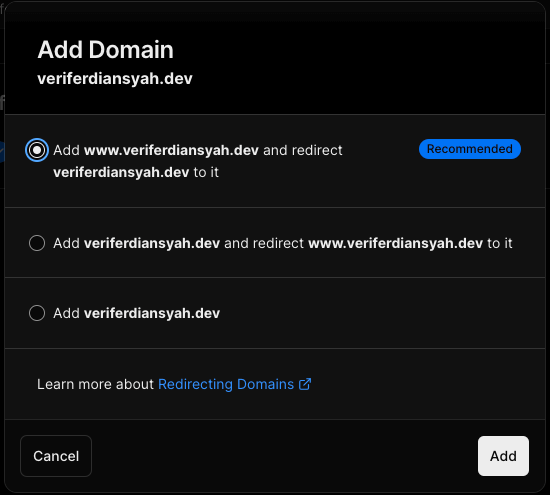
A modal will popup and just choose the recommended option.
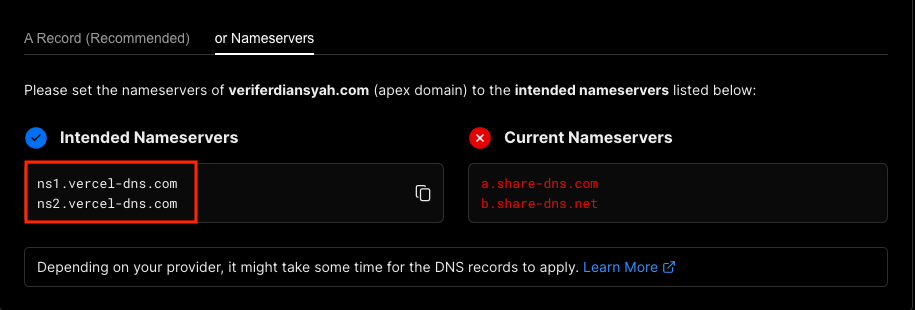
You will then see your domain's A record like the image below.

Click on the or Nameservers tab and click on the Enable Vercel DNS button.

It will display the nameserver information that you will need to put to your domain in Namecheap.
Namecheap Setup
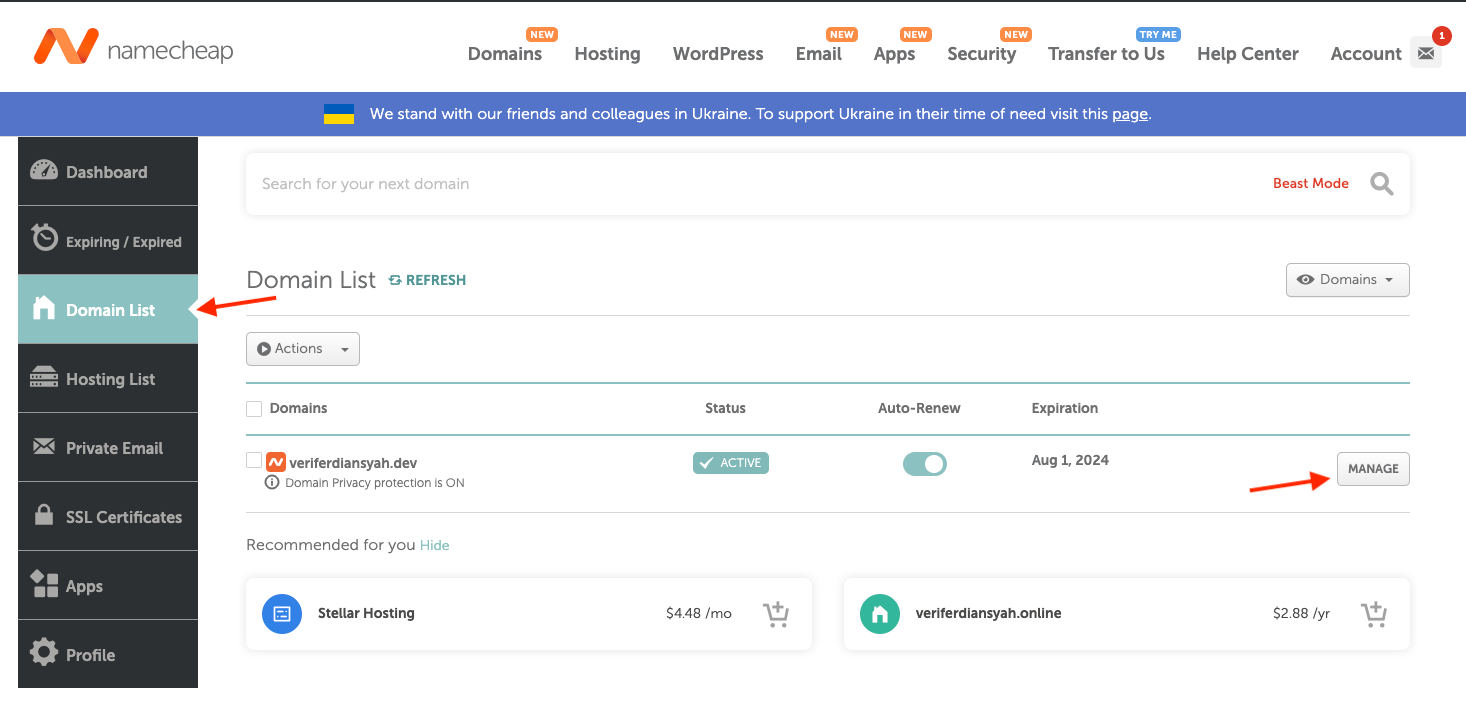
Once our setup in Vercel is complete, we need to setup our domain in Namecheap. So go to https://namecheap.com/ and login with your credentials.
Once you're logged in, go to Domain List from the sidebar, choose the domain that you want to configure, and click on MANAGE.
Now, find the NAMESERVERS, click on the dropdown and select Custom DNS.
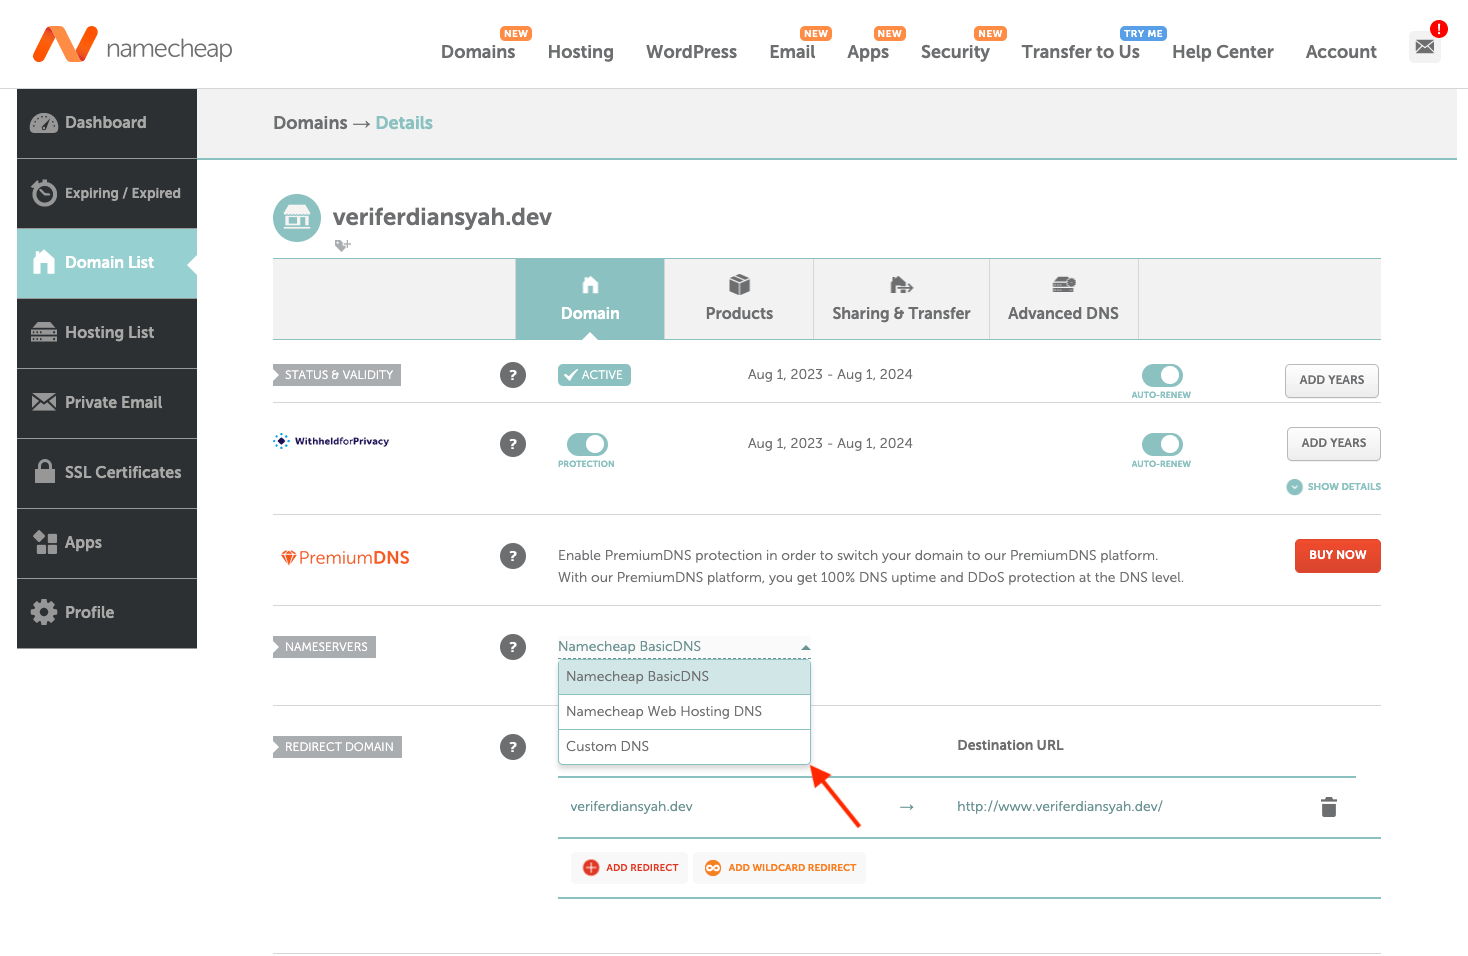
Input Vercel's nameserver addresses and click the green checkmark on the right.

That's it! You're done! Now you just need to wait until it propagates and you will be able to access your website using your own domain.